

Writing blog requires lots of setups, a good place, your desk, something to make you focus constantly, a good laptop, Internet connection, a cup of coffee (not necessarily) and much more. Having everything ready yet all of sudden it failed to synchronize the one another and all your every bit of hard work is in vain. For instance, if your internet connection failed or your machine shut down because of the power outage, you probably will loose some of your work. Although, WordPress have the really nice system which keeps your record in backup as ‘revision’. However, if you are someone who loves the little big of editing every time here and there, you probably make burden to your database and server. So, I think having live blog writer is always a safe hand for lightening the database load and easy editing.

Blogo editor dashboard.
Blogo does have paid version for sale, but this post is totally targeted to Free version and see if we can write a blog post using Free Live Writer on MacBook Pro.
Microsoft does provide a great and free live blogging tool “Window Live Writer”, which sadly support only native Microsoft operating system. I was keenly looking for something Free Live Blog writing tool for MacBook pro. If you are already setup blog in WordPress, you can try and test the apps called Blogo, I am writing this WordPress post from Blogo as testing and I will try to cover as much as possible.
You can easily download the Blogo from above link, the installation will take few minutes based on your internet connection. Then, You will be asked for setting up your blog. Your login details and yo![]() ur blog address will be required and you are done.
ur blog address will be required and you are done.
To start blogging in Blogo, simply click the square and pen kind of images located on the top left. By default, it will be selected to post type in the right pane of the writer but it is always good to make sure what you are doing. Which eventually mean you can add and edit pages from Macbook live blog writer.
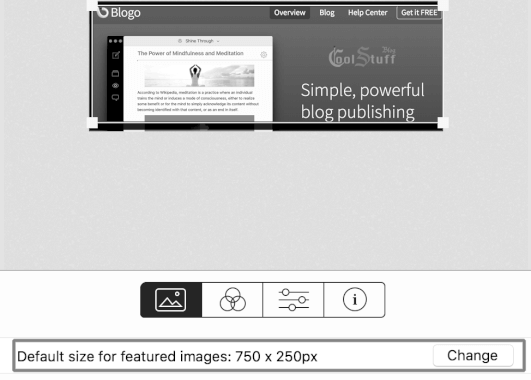
How to change Featured images size in Blogo?
Blogo free version does allow you to add images and featured images for the post. You can choose the images from the right side of the editor dashboard. The good stuff is you can crop and change the style of images to Black and white, original, sepia and old.
Adding images in Blogo free live blog writing is also easy as it is. Simply right click to the editor dashboard and you have the Insert images option. Simply follow your image path and upload. If you have images in your camera or somewhere on the third drive, you can import it from right click as well.
What more we need while posting a blog with Blogo?
A link on the blog post? simply select the text and click to hyperlink sign.
A heading to the text? do select the text and select the Hs at the end and choose which heading you want. Similarly, you can add the list as well.
How to add additional HTML or CSS in code? It is easy to HTML and CSS code in blogo live writer to your blog post. Simply, add /HTML and start writing your HTML code.
For the tags, you can choose on from the button on the text writing area. On the right side of the text area, you can find the ‘Custom Slug’ where you can specify your blog post address after your blog.
Read this also: Basic Search Engine Optimization (SEO) tips for beginner
If you are running a blog with video post, Blogo also made it easy for you to enclose the video from video hosting site like Youtube. To embed the youtube video simply copy the youtube.com/watch?v=andyourvideo details including https and paste it to the post where you the video to display. Including Youtube, you can do the embedding with Vimeo, Instagram, Twitter, Vine, DailyMotion, Flickr, GettyImages, Imgur, SoundCloud, Dailymotion as well.
You can choose to allow and deny comment and pingbacks from live writer itself. The blog writer allows you to schedule a post for particular date and time.
What more can we see from Blogo? oh! one good statistic on ℹ️icon on the button of the post shows the total number of words, Chars and estimated reading time for this post. Not sure how relevant this will be but I guess, it is fun and interesting to enclose this information while sharing the post.
How to add Category and Tag Separately in Blogo
Where is category located in Blogo? Oh! God, it is located together with tags in the button of the writing area. I guess this might make an issue for my post. Tags and categories are totally two different kinds of stuff. I have a category based menu and post are sorted by category, where I use tag only for the keyword phrase.
Oh, Hello wait, I found the solution, it was written CMD + 5 in MacBook and you will have a new pan, you can only choose the category and tags, which you already specify from WordPress, you can’t create the new tag and category here, at least NOT in the free version.
Meanwhile, This is my first post using Blogo, If you have anything to include in next post, please do write below in comments.